Tutorial

COLOUR | Scarily Cute Pumpkin
  • tool: markers + coloured pencils
  • difficulty: medium

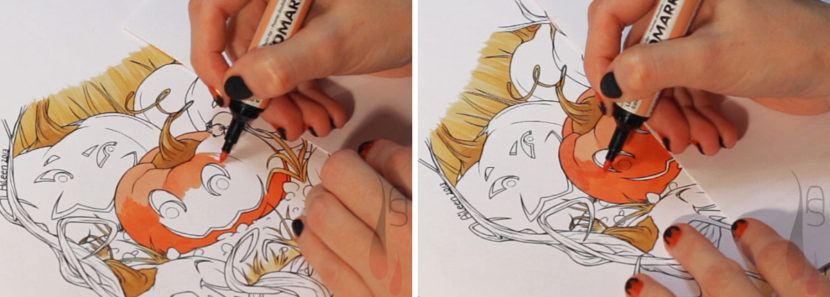
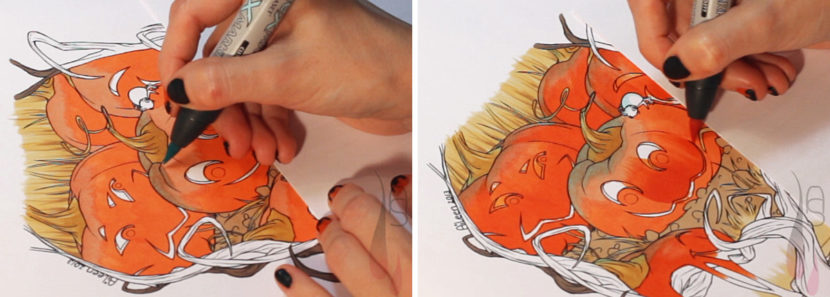
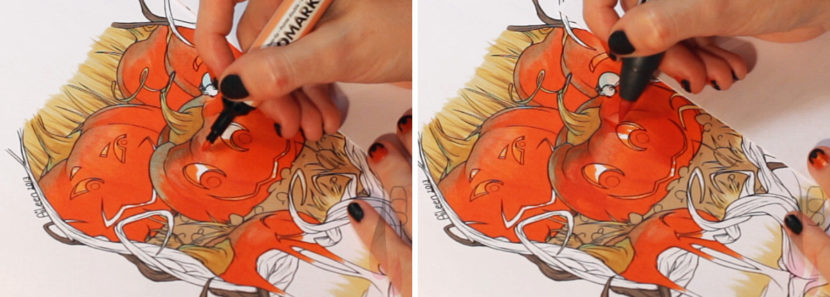
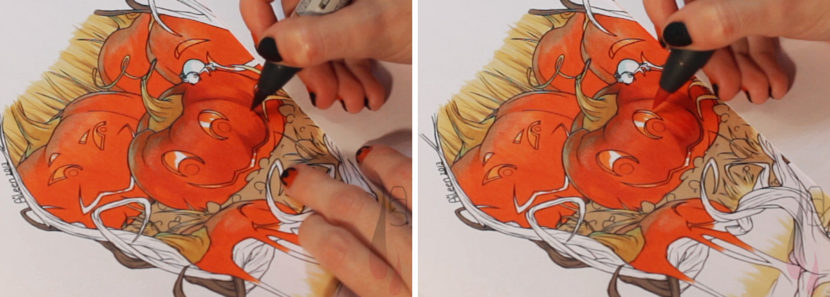
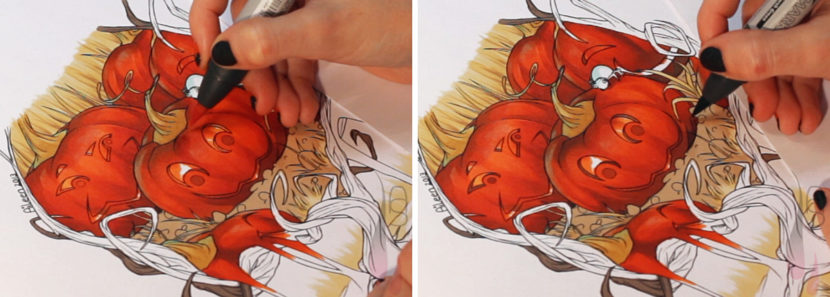
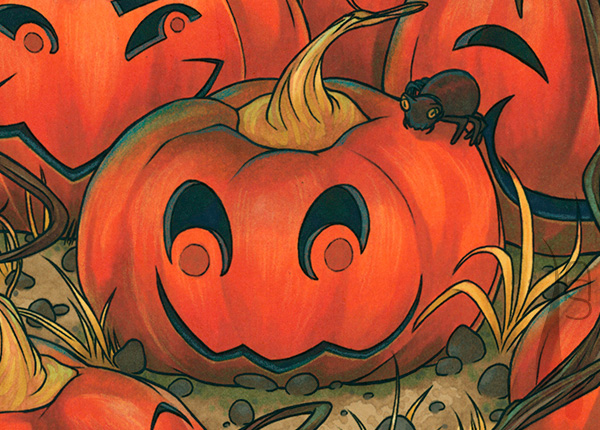
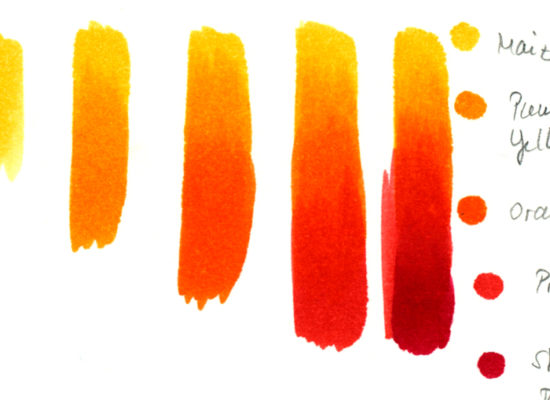
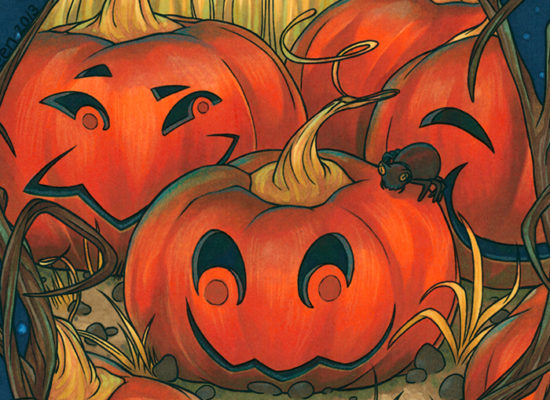
Even though Halloween has long been over, pumpkins are still ‘up to date’ this season… it’s not winter yet. Overall I did work on a slightly larger illustration, but for this basics tutorial I wanted to focus on the colouring of a pumpkin. When thinking about autumn colours, it’s all vibrant yellow, orange and lush reds. So an orange pumpkin seemed like a good example to show how to layer and blend colours.

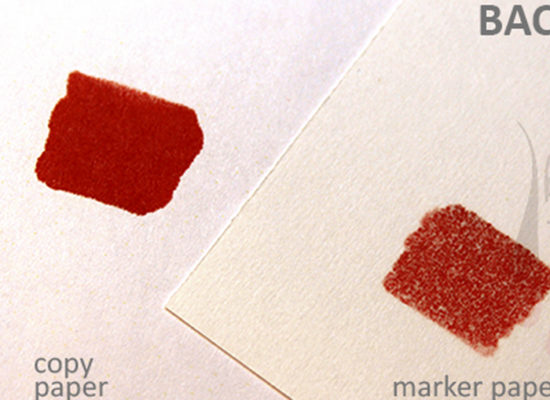
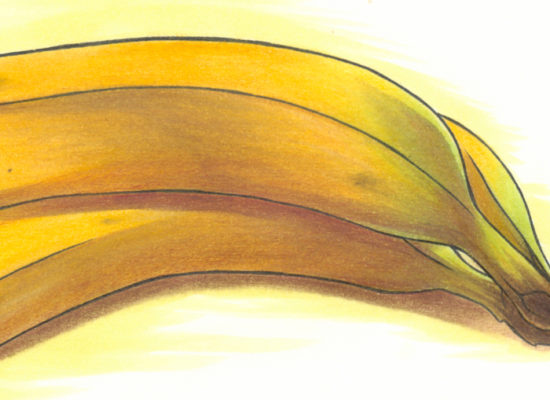
When I started the illustration I knew I might end up with many layers of marker colour and decided to use a paper, which could handle the large amounts of ink. I did not use any fancy paper, but instead I opted for box-standard copy paper. The downside to using normal copy paper is that fact, that the colour tends spread more than on paper designed for marker use. If you keep this in mind, there shouldn’t be any problem with the colouring. Just a note of advice, put a spare piece of paper underneath, because the colour will bleed through and stain everything underneath.

So let’s start with pumpkin colouring.

Step 1

As with almost all the illustrations I am working on, I start with the base layer and build up the colour from there. This results in in richer and slightly textured colours.

For this image I used Starfish (sprig/summer limited edition ProMarker) and Mandarin (Flexmarker) for the very base, while flicking Mandarin into the Starfish. In order to have the two colours blend better, I quickly added a second layer of Starfish on the upper lighter orange of the pumpkin. With this the ‘flat’ base colour was finished and I could continue with the ‘volume shaping’.

A tutorial on colouring Halloween themed pumpkins with markers.
Step 2

Before I applied more orange on top, I wanted to add a little reflective light. The whole image is a night scene, so I picked Aquamarine for the faint glow, which I put onto the light orange with the brush nib. Then I started to flesh out the pumpkin shape with Mandarin.

A tutorial on colouring Halloween themed pumpkins with markers.

 
I used Starfish again to blend some of the Mandarin. While doing this I intentionally went over the Aquamarine in a few places as some of the blue still shines through. With the brush nib of Mandarin I defined a bit more shape of the pumpkin’s top leaving the sharper edges intact.

A tutorial on colouring Halloween themed pumpkins with markers.
Step 3

The next step was to add some shade to the pumpkin with Nutmeg. I only applied it on the lower third of the pumpkin following its bumps. Yet again, I used Mandarin to blend Nutmeg into the colour underneath. I repeated this process a couple of times to darken the colour even more.

A tutorial on colouring Halloween themed pumpkins with markers.
Step 4

I still wasn’t happy with a few parts of the pumpkin’s colouring, so I put a bit more Mandarin onto the existing layers to even out the Nutmeg. Still with the night scene in mind I decided to tie the pumpkin more into the background by adding a touch of greyish dark green close to the ground. I applied Marsh Green, which I let fade out with a bit of Nutmeg and Mandarin.

A tutorial on colouring Halloween themed pumpkins with markers.
Step 5

With the overall colouring of the orange body done, I put down Solstice Blue (autumn/winter special edition ProMarker) for the inside of the pumpkin. For a tad more texture I added a few curved strokes of Naples yellow with a coloured pencil and some Aquamarine pencil for the faint ‘glowy-ness’ of the reflected light (top and cut-out of eyes and mouth).

A tutorial on colouring Halloween themed pumpkins with markers.

 
I hope you enjoyed the tutorial on the pumpkin colouring and have fun trying it out too. Until next time!

 
© Aileen Strauch, first published on the Letraset art blog in 2013