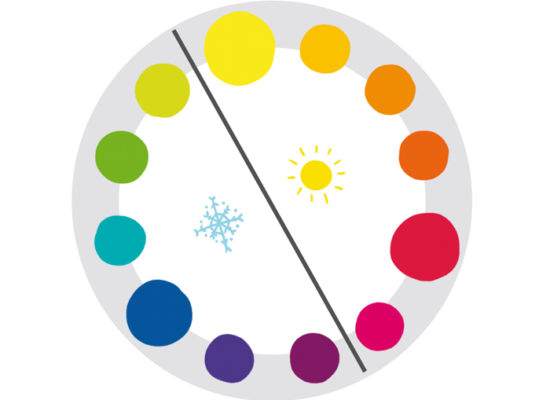
Tutorial

TECHNIQUES | Getting Started with Markers
  • tool: markers

Markers are really a great tool when it comes to traditional colouring and are rather clean at that. No tubes, mixing pallets, brushes or water required. Generally they are easy to use, but they need a bit of practice. Don’t be discouraged, if the first try doesn’t work out the way you wanted it to. Keep practicing and have fun!

What Marker to Choose?

This is probably the first question you should ask yourself. What do you want to draw/colour with markers? Do you want to fill areas with colour, or do you want to shade and create soft gradients as well? And of course: what is your budget? Think about those first before choosing any marker.

Below I have a little sample of strokes made with a ProMarker and a FlexMarker (both Berry Red/C528). The main difference is the brush tip of the FlexMarker compared to the small nib on the ProMarker. The ProMarker is fine for any type of colouring, be it about filling areas with colour or creating gradients. It doesn’t matter, if you are making cards or colouring an illustration.

A tutorial on getting started with markers.

 
If you are looking for a greater control over gradients, colours, which fade out softly, or want to create distinct details in hair such as strands, the brush nib does make it much easier.

What paper to use?

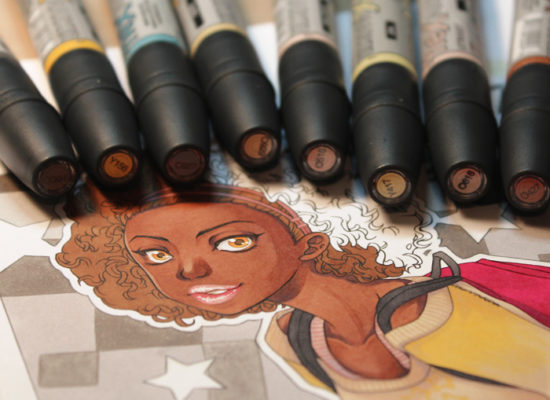
This is one question, which I can’t answer per se, but when I get asked about paper, I mostly reply that you need to try out different sorts of paper yourself and see what works for you. The paper choice should also be influenced by what you need it for. Obviously, when you want to create a card, you should use thicker paper (card stock, bristol board etc.). Is it an illustration you are working on, then thinner paper will do perfectly fine. Technically any type of paper can be used, but you need to be aware of how the marker behaves.

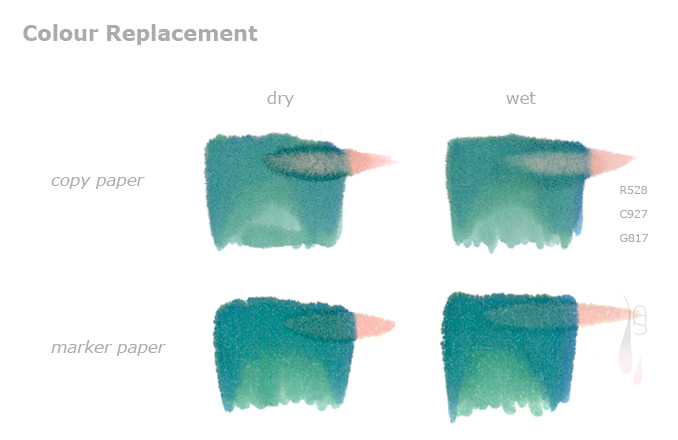
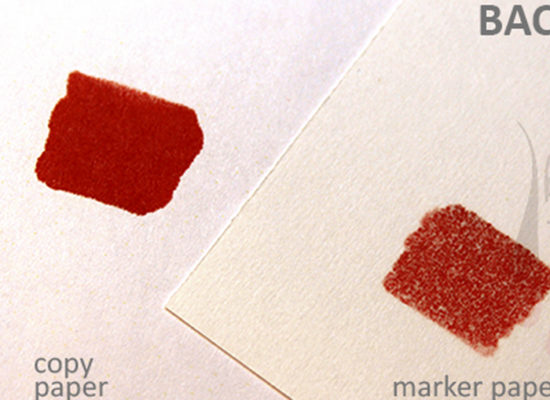
Marker paper for example is very good for illustrations, the colour doesn’t bleed, nor does it stain the surface beneath, though it is quite thin. Normal copy paper can be used too, but the colour does spread and stains everything underneath. On the plus side, some techniques work on this paper, which don’t work well on marker paper. Generally, the thicker the paper, the more colour it absorbs and stains underneath will always occur to some extent. To prevent these, just put a spare piece of paper underneath.

In any case, try out the markers on the paper you want to use before you work on your creation and observe how the marker behaves. Don’t do it on your actual artwork. The colour of markers is permanent and you WON’T be able to fix any mistake.

A tutorial on getting started with markers.
Choosing a Pen for Outlines 

This is very critical for illustrations when you colour inked outlines. Fineliners or ink (for dip pens) need to be marker-proof! Some fineliners are ‘permanent’, but this doesn’t make them marker-proof. If you are unsure whether the fineliner/ink is marker-proof, or not, try it out on a sperate piece of paper. Nothing is more heartbreaking than ruining your drawing by choosing the wrong ‘ink’.

Not all fineliners/ink do smudge to the same extend, but the risk should be kept to a minimum.

A tutorial on getting started with markers.
How to Start Colouring

The advantage you have when you work with markers is that the colour can be applied (almost) streak free depending on the technique and size of the area to be coloured. Markers do tend to dry quickly, which is why you should work fast. If you continuously colour an area without stopping for a small break, you can get that ‘even coloured’ result markers are knows for. However, if you aren’t fast enough and ‘connect’ the same colour to a dried part, chances are you get a sharp edge like in the sample beneath. Sometimes these little mishaps are unavoidable due to the size of the coloured area, so try to break it up into smaller parts if possible (ie. divided spaces by outlines).
The colour I used this time is ‘Duck Egg’/C528.

A tutorial on getting started with markers.
Layering One Single Colour

Contrary to what some might believe at first, you can go quite a bit with just one colour. Markers are transparent and it is possible to darken the colour by layering it on top of each other a few times. This can be done with any colour. Putting down a new layer of colour on top of a dried one will result in sharp edges, while doing the same process while the colour is still wet will give you very soft edges.

A tutorial on getting started with markers.
Mixing Colours

One thing to keep in mind is that marker colours are translucent and never opaque. This allows you to create beautiful effects and works to your advantage, especially if you work with a limited amount of markers. People, who just started with markers most likely will not own the whole palette of available colours, nor will most people do; and it is not necessary either.

Marker colours can easily be mixed by layering them on top of each other to create a new one. This is a good option, when you are missing specific colours, or are looking for a colour with that exact tone you have in mind. These mixed colours tend to be visually more appealing than its pre-mixed counterparts as well.

When mixing colours, take notice of the intensity and brightness of the two colours you are choosing. Not all colours can be mixed successfully for a visible result. In case you want to mix a rather bright colour and a dark one, chances are you won’t see much of a difference. Try your own colour choices on a separate piece of paper and enjoy experimenting with them.

A tutorial on getting started with markers.
Layering Colours

Layering, or building up colour is what creates depth and visual interest in your piece. Rather than sticking to the ‘same’ colour and stacking it up, use different values and shades while remaining in the same colour family. Remember, that due to the translucent nature of the marker colour, the colour you add on top will darken the overall outcome. Hence I also like to call it a multiply effect. Again, this might be a bit tricky to get right the first time, but with practice you’ll get to know what works for you.

A tutorial on getting started with markers.

 
One very important fact to address is the use of grey. Grey indeed is a very versatile ‘colour’ (or neutral colour), which can be used in many ways. A lot of people assume grey is well used for shading, or to create depth. This is a simple NO. Please don’t use any grey for shading unless there is some specific effect you are after. Why no grey you might ask? The chances are that your image will look dull or dirty, whether you used a neutral, warm or cool grey.

On the left is an example of a coral tone, which I shaded with a similar, but darker colour and with a cool grey on the right. The left example looks more vibrant than the one with the grey. So when shading, use grey with caution.

Are there any other uses for grey? Certainly. Greys are great when it comes to toning down colours. Sometimes a colour is just a tad to bright or saturated. Just take a grey to your liking and apply it on top. The best results are achieved when the grey is applied on top of a dried colour. You can also adjust the level of desaturation with the brightness of the grey.

A tutorial on getting started with markers.
Colour Replacement

This is a nifty little effect, which can be used for interesting effects. I like to call it ‘colour replacement’. In case you want to try it out, make sure you have the right type of paper for it. It works well on copy paper or bristol board, or any type of paper, which has a higher absorption rate. Unfortunately it doesn’t work on marker paper.

The examples below show the results of the effect when used on either still wet or already dried colour. What this effect does, is to push the existing colour out of the way and being replaced with the new colour. This effect looks quite well, when a lighter replacement colour is used, or one, which has a similar saturation and brightness, but comes from a different colour family.

The problem with the marker paper lies therein that once the colour is applied, it sits in the paper and can’t be moved anymore. If you want to make use of this effect, just use the proper paper and have fun with it.

A tutorial on getting started with markers.

 
I hope this tutorial proves to be useful to you and encourages you to try a few of these. Until next time!

 
© Aileen Strauch, first published on the Letraset art blog in 2013